
There are many features in Reaper that are very useful when mastering. In this article we’ll have a look at three features that in my opinion are the the most important ones!
Feature # 1 – Custom keyboard shortcuts
A big reason for the popularity of Reaper is the ability to customize it however you want. You can use different themes to change the looks. It’s possible to customize buttons and menus. You can add features by installing extensions, like the almost-mandatory SWS/S&M extensions. By using scripting you can also add new functionality, either by writing scripts yourself or by adding them from a number of various available sources.
But the simplest and probably most instantly rewarding way to customize Reaper is to add your own keyboard shortcuts. It’s an immense time-saver to have things that you do often readily available at a simple key-press. And adding your own shortcuts is very easy to do in Reaper.
Any button, menu option or keyboard shortcut in Reaper will usually trigger an action. You will find all the available actions in the action list. To open the action list you can either find it under Actions -> Show action list… or, more easily, by pressing the keyboard shortcut
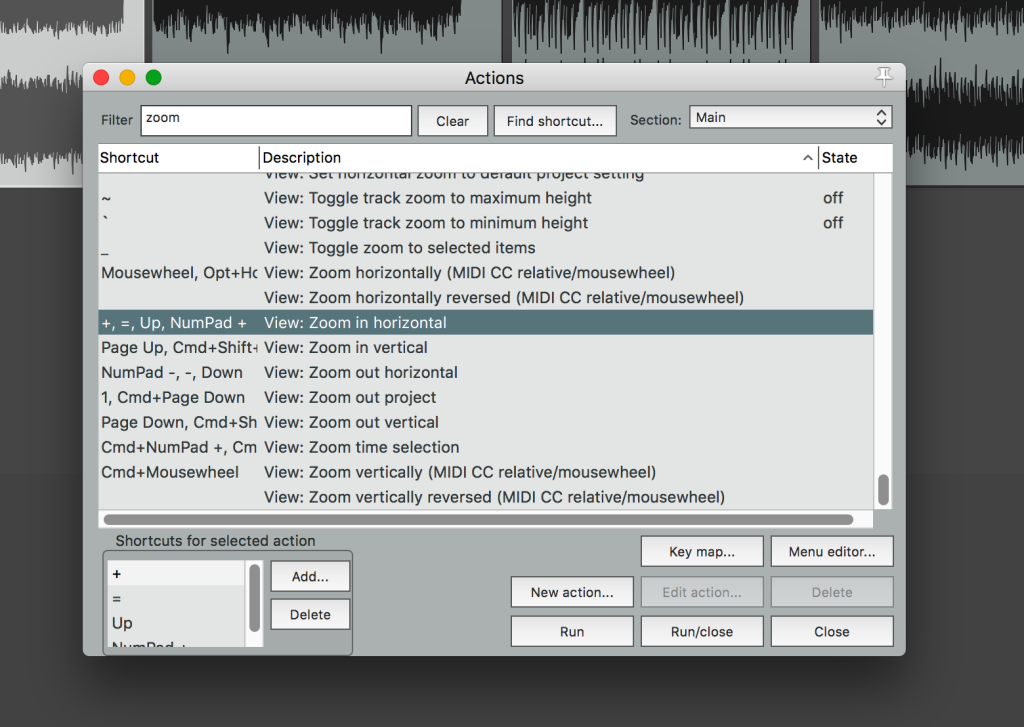
And as you can see, there are lots and lots of actions! Luckily for us, there is a search function! You can add your own shortcut for any action in this window.
My strategy for adding shortcuts is to notice whenever I find myself hunting for something in the menus or in the action list, and I know that I’ve looked for this action before. Then it’s time to either look up the already existing shortcut or add a new one.
By noticing these situations and actively finding or adding keyboard shortcuts, you will over time customize your Reaper setup to be blazingly fast and productive for your specific workflow!
Feature #2 – Take FX
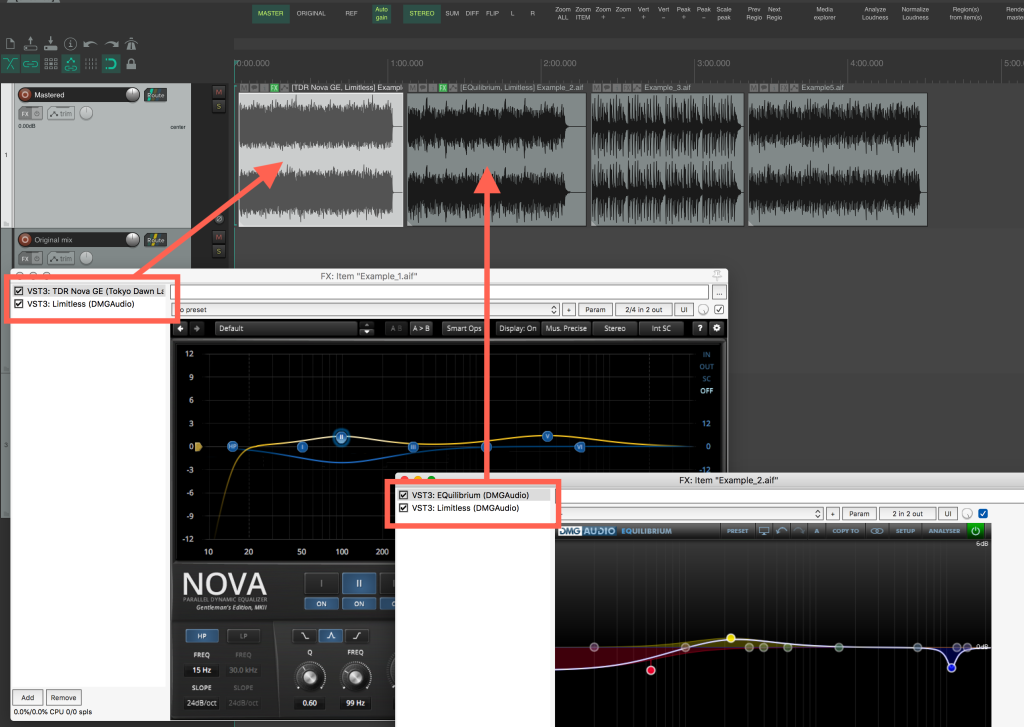
If you are mastering more than one song in the same project, for example when mastering an album or an EP, then Take FX is a very powerful feature in Reaper. This will let you have different processing for each song by having an unique plugin chain on each item.
A common way to master multiple songs in other DAWs is to let each song have their own track. Then you use the plugin chain on each track in order to process each song differently.
There are two big advantages of using Take FX instead of one track per song though:
- It reduces the visual clutter in the project when you can keep all songs on the same track. Editing and navigation gets much easier.
- The overall CPU load is reduced since the plugins for each item will only use the CPU while the song is actually playing.
You can use plugins on the track as well and these will then affect all the items on that track. For example, you can have the final peak limiting as a track effect, and then add individual EQ plugins to each song. This is a great way to work if the different songs already sound fairly similar and only need individual EQ tweaks in order to make the album sound cohesive.
You can of course also have a complete and unique mastering chain for each song. Then you have complete freedom to tailor the sound of each song individually. This is the method that I most often use when mastering.
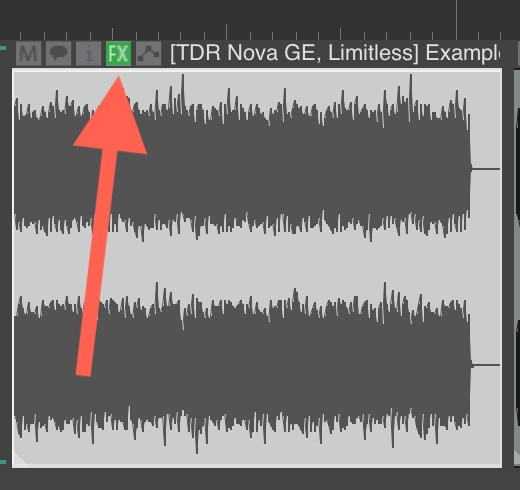
You can reach the Take FX most easily by clicking the FX button on each item.
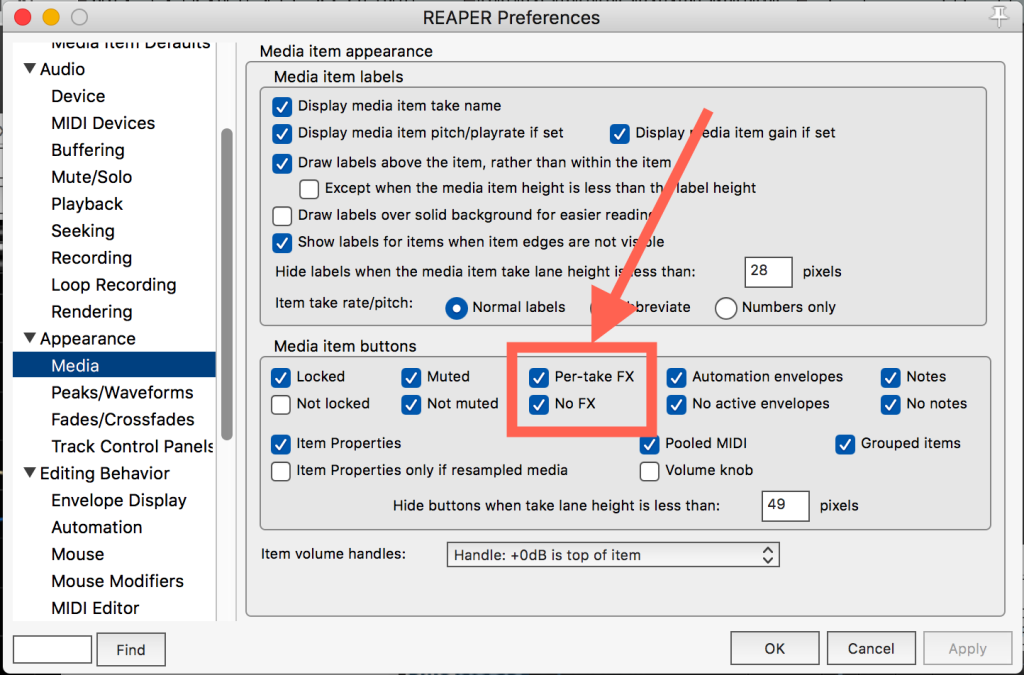
If you can’t find this button then you need to enable it in the preferences. Go to Appearance -> Media and make sure that “Per-take FX” and “No FX” are enabled.
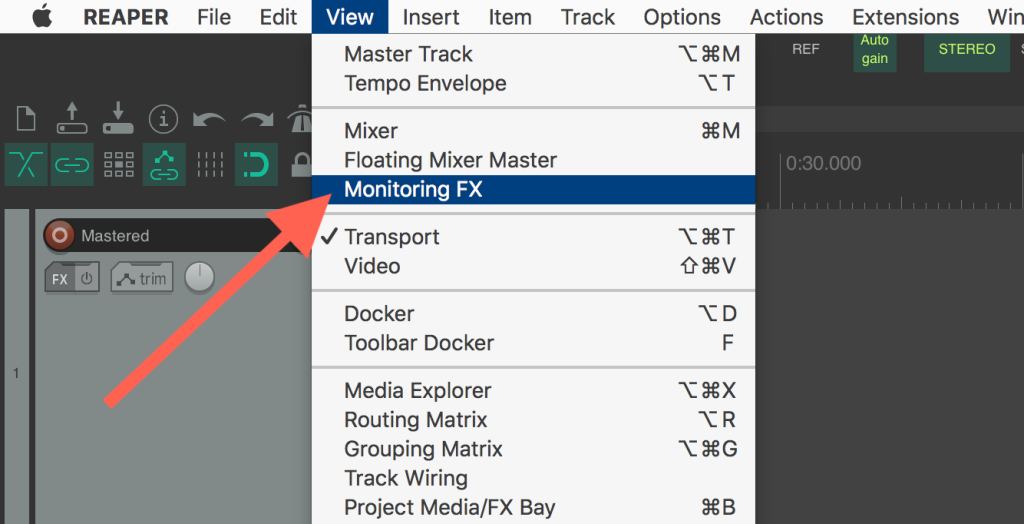
Feature #3 – Monitor FX
There are certain plugins that are meant to be used for monitoring only, and not for actually altering the sound of your mix or master. This can for example be cross-feed plugins, headphones correction plugins, or other plugins that make it easier to mix or master using headphones.
If you place these plugins on the master track then it is important to disable them before bouncing your final mix or master. This is both easy to forget and tedious to do.
In Reaper you can instead place these plugin in a completely different plugin chain called Monitor FX. Anything that you place in this chain will affect what you hear on the outputs of your audio interface, but they will not end up in any render.
To access the Monitor FX chain, go to View -> Monitoring FX.
Summary
So these are three features in Reaper that in my opinion are essential for mastering!
If you are new to mastering in Reaper and are looking for somewhere to start, then I can recommend our Mastering Starter Pack for Reaper! This is a free package of settings and scripts for Reaper that will make it easier to master music.
By using this starter pack you will get:
- Automated loudness matching – make better decisions!
- A project template for mastering
- Tweaked settings and custom scripts that will improve the mastering workflow
- A custom toolbar to help you get started in Reaper
Go ahead and have a look!
/Thomas
Thanks for this (and your Reaper template – it’s amazing)! I use Take Effects as you describe but sometimes I get a pop at the start of the item when rendering. I’ve heard this is due to a plugin turning on when the play head reaches the beginning of the item. Is there a workaround that you’re aware of?
Unrelated, but I’d be willing to pay for more Reaper mastering tools to complement your template.
Hi John, great to hear that you like the Starter Pack! 🙂
Yes, the pop at the start of the items with take FX can be a problem and I’m not aware of any way to completely avoid it. Our workaround is to render the full take before editing, so that any pop can be edited out. The action “Item: Render items to new take” works great for this.
We have some plans for a more advanced mastering pack for Reaper. Feel free to let us know if there are any specific features that you would like to see. Either by commenting here or by emailing us at info@masteringexplained.com.
/Thomas